
Use marker-based augmented reality
Model Vista Web uses an image marker to define the augmented reality origin. The marker center becomes scene position (0, 0, 0), its printed face becomes the ground plane, and every loaded model keeps its current scene transform.
AR requires the HTTPS Model Vista Web application, or localhost during local development, and a browser with access to a device camera.
Prepare the scene and marker
Section titled “Prepare the scene and marker”- Load one or more models and arrange them around the scene origin.
- Select Enter AR in the top bar.
- Use the bundled Model Vista AR Origin marker, or select Create from image to make a marker for the current session.
- Select Print marker or Download image. Print at 100% or Actual Size with page scaling disabled, or show the marker on another screen.
- Measure the displayed or printed marker and enter its physical width under Printed marker width. The supported range is 50–180 mm.
A custom marker can be a PNG, JPEG, WebP, or SVG image and must be at least 640 × 480 pixels. The viewer center-crops it to a 4:3 tracking area. For steadier tracking, use an image with strong contrast and distinct, asymmetric details; check the displayed Tracking image rating before continuing.
Choose the scene scale
Section titled “Choose the scene scale”Leave Auto fit enabled to fit all loaded models to the marker. At 100%, the viewer fits the scene bounds with padding. Use Initial model size to choose a value from 25% to 400%.
Turn off Auto fit when the asset uses physical glTF units and you need a 1:1 presentation. In this mode, one glTF unit equals one metre and Printed marker width calibrates the scene scale.
Start and use AR
Section titled “Start and use AR”- Place the marker on a flat surface or show it steadily on another screen.
- Select Start AR.
- Allow camera access when the browser asks.
- Point the camera at the complete marker and hold it steady until the status reports that the marker is being tracked.
- Move the camera around the marker to inspect the loaded scene.
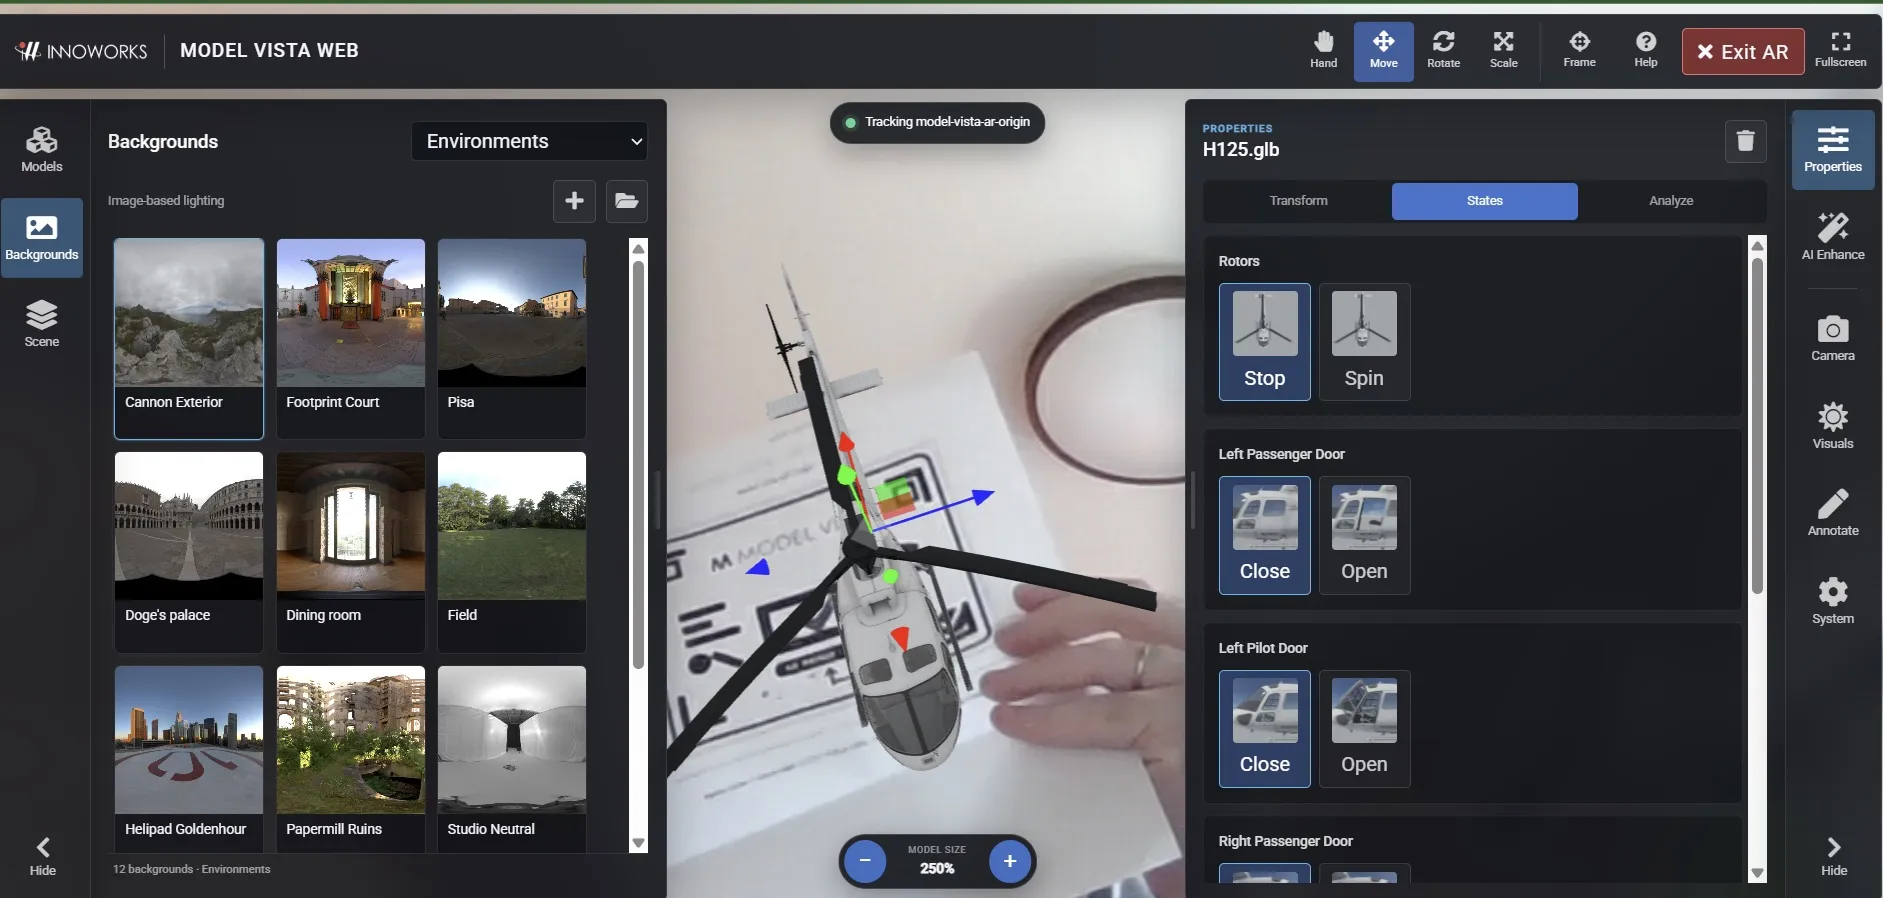
When Auto fit is enabled, use the minus and plus controls during AR to change the model size in 25% steps. The viewer hides its desktop ground-plane and drawing overlays while AR is active.
If the marker leaves the camera view, the status reports that tracking is lost. Point the camera at the marker again to restore the tracked pose.
Exit AR
Section titled “Exit AR”Select Exit AR in the top bar. The viewer returns to its normal camera and restores the desktop overlays. The loaded models and their scene transforms remain unchanged.
For camera, runtime, tracking, and scale problems, see compatibility and troubleshooting.
